Power Platform ALM using GitHub Actions

For Power Platform ALM we used Power Platform Build Tools for Azure DevOps to establish continuous integration and continuous deployment pipeline. Azure DevOps has his strengths working with internal teams but gets challenging if you want to build app with different externals or a community.
Recently we built some Power Apps within our Smart Factory community and want to share and contribute with a broader audience. GitHub was the preferred repository! And of course, we want to establish ALM CI/CD similar as we have it in Azure DevOps.
Microsoft launched GitHub Actions for Microsoft Power Platform and it’s relatively straightforward to establish it for you own GitHub repository. Enclose I would like to share on one example “Visitor Management” how we used GitHub Actions and established organization wide action templates for any other repository.
Visitor Management solution
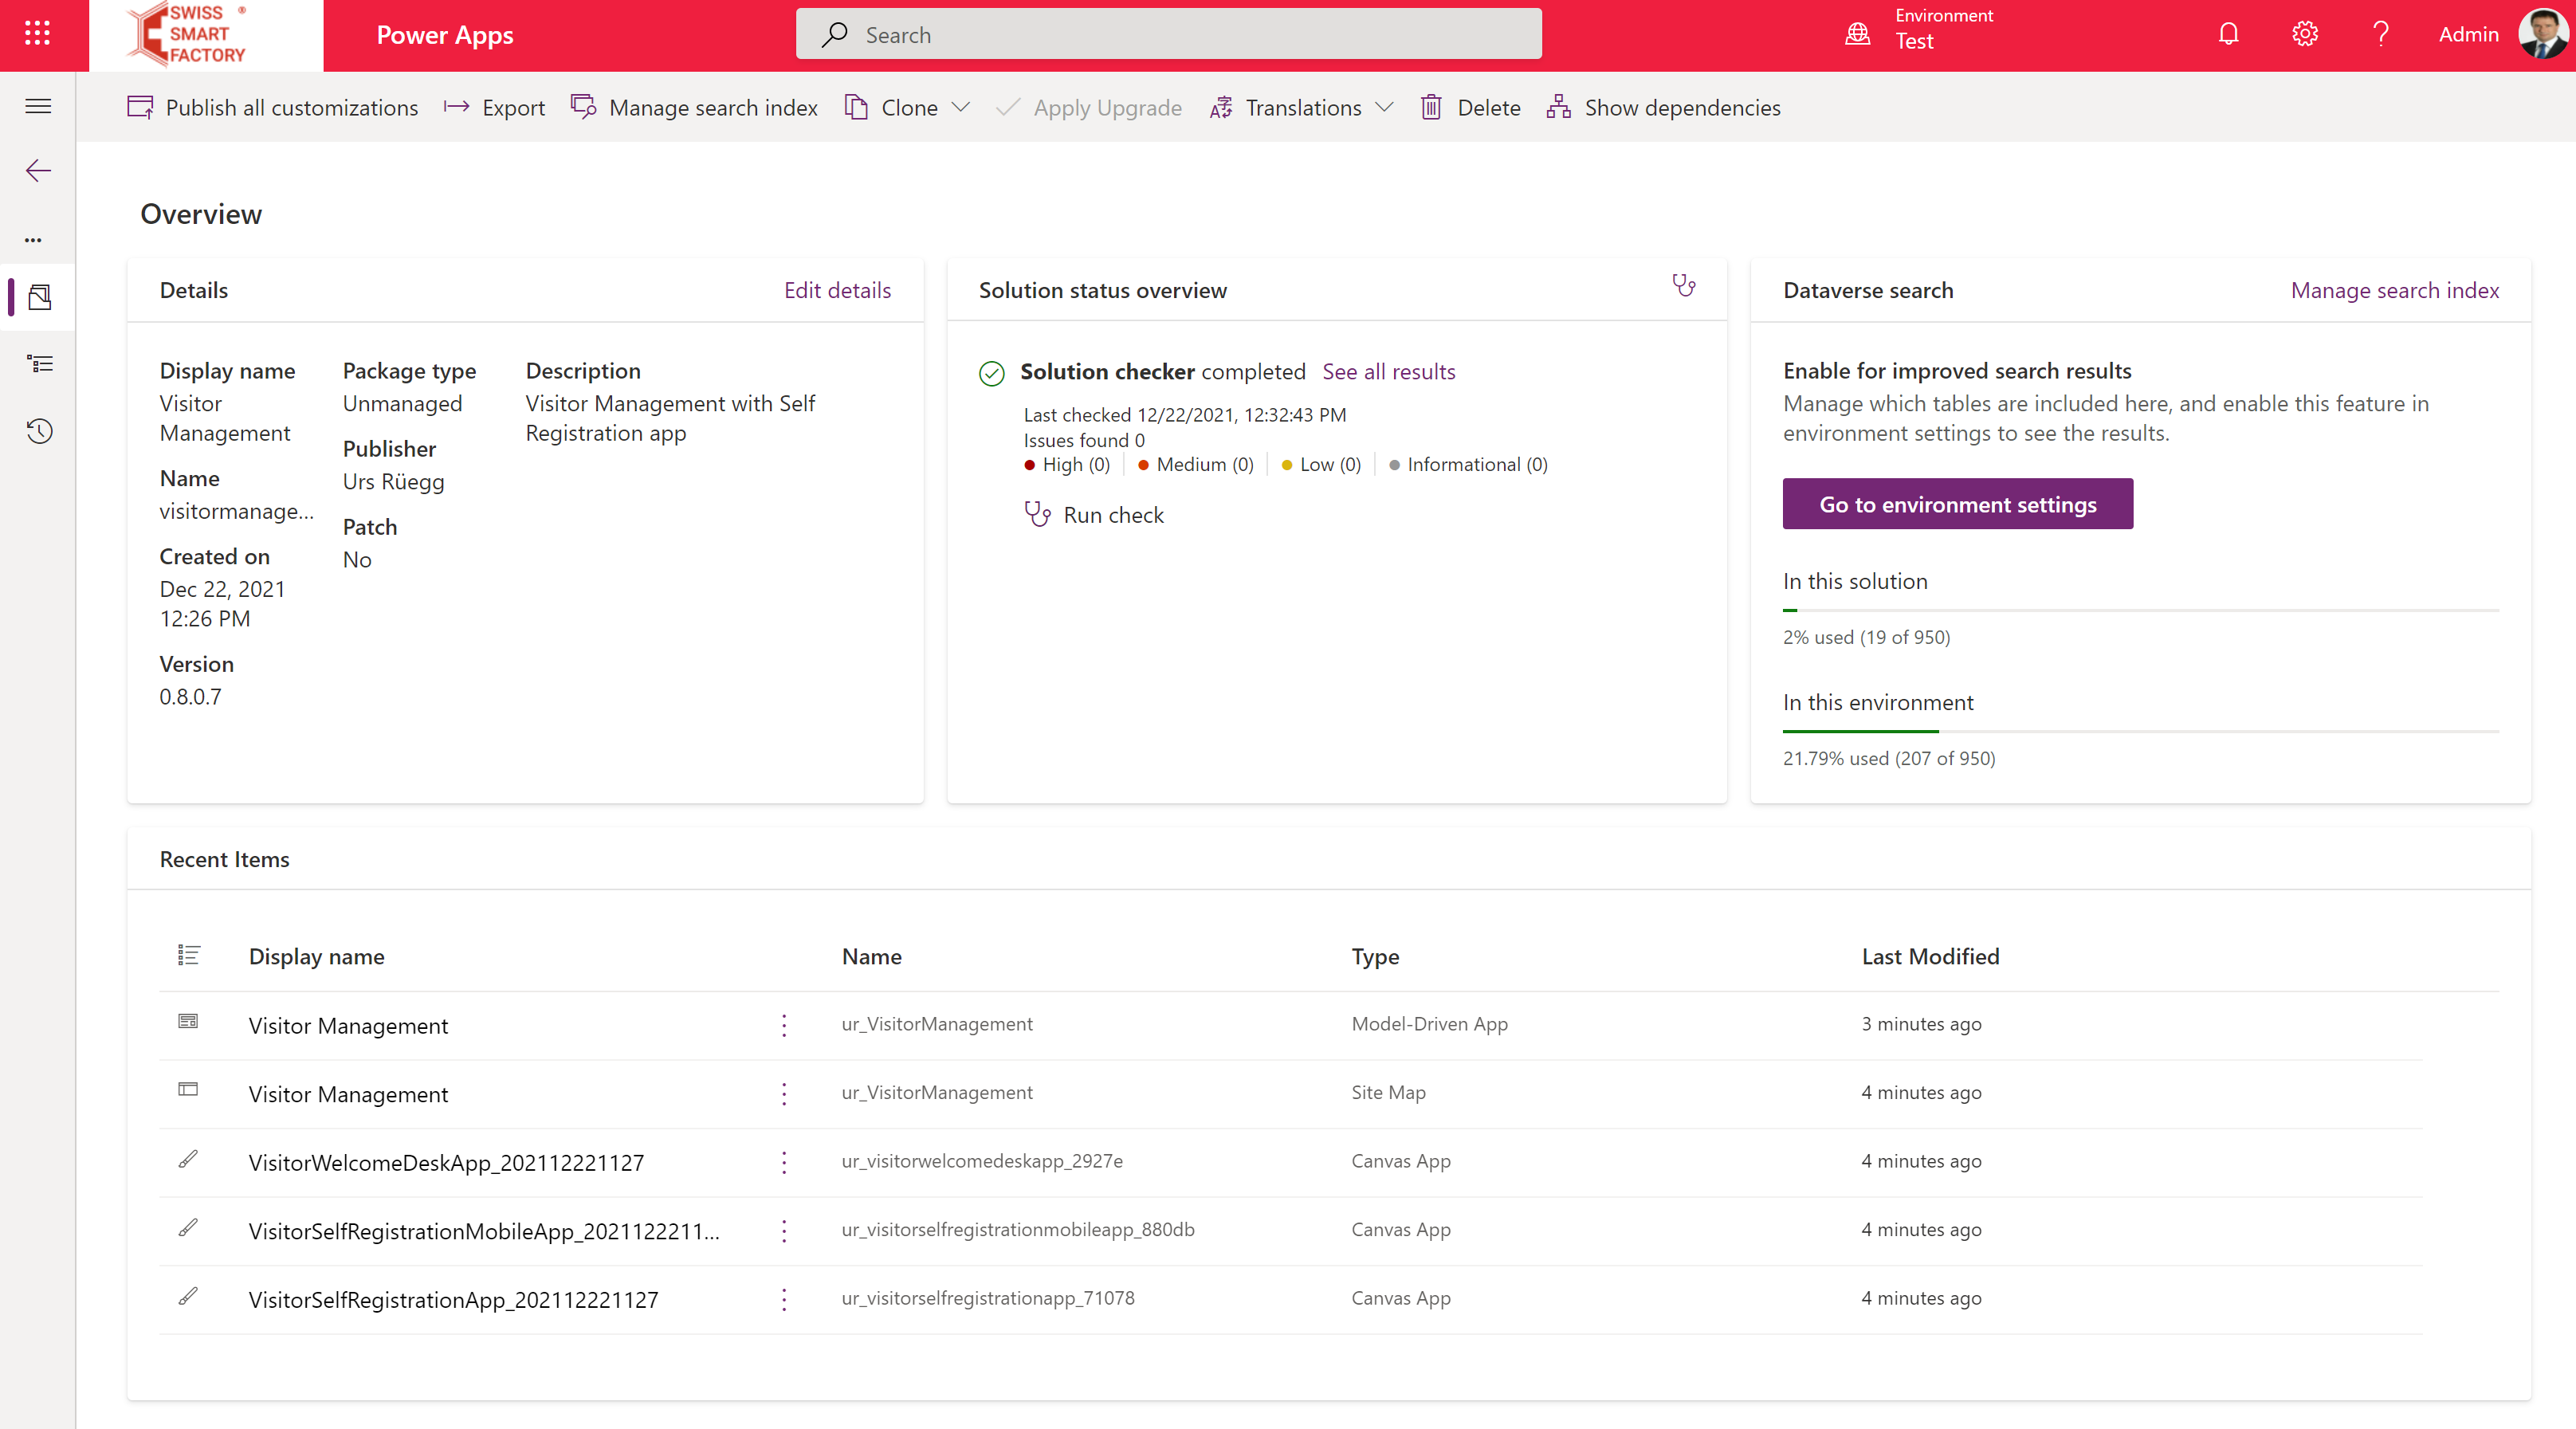
The Visitor Management is a collection of four Power Apps to manage smart factory visitors. We build this apps during a three-day Hackathon with the Swiss Smart Factory team.

Let’s use this solution to implement a healthy application lifecycle management (ALM) using Microsoft Power Platform and GitHub.
Steps
There are six steps to establish the GitHub Action for one repository and to publish those to the organization templates to ne used for all other repositories too.
- Create required environments for development, build and production
- Create the service principal account and give it rights to the environments created
- Application user creation
- Create a new GitHub repository
- Create GitHub workflows using GitHub Actions for Microsoft Power Platform
- Add the GitHub Actions to the organization templates
Step 1 - Create required environments for development, build and production
You will need to create, or have access to, three Dataverse environments in your tenant. I recommend establishing some naming conventions to group the artefacts logically and standardize naming for environment, security group, etc.
All three environments should have equal configurations, except
|
Environment |
Development |
Test |
Production |
|
Environment type |
Staging, as you might want to be able to copy, backup or reset the environment |
Staging, as you might want to be able to copy, backup or reset the environment |
Production |
|
Environment URL |
Use dev as a postfix of the production environment name. For example: [production_name]dev. |
Use test as a postfix of the production environment name. For example: [production_name]test. |
No postfix. Only production environment name. For example: [production_name]. |
|
Security group |
Assign the Security Group where your developers are member of. For example, [App Name]_Developers |
Assign the Security Group where your developers are member of. For example, [App Name]_Testers |
Assign the Security Group where your production users are member of. For example, [App Name]_Users |
|
Updates |
Release wave Off, as you want to control what apps/resources are deployed. |
Release wave Off, as you want to control what apps/resources are deployed. |
Release wave Off, as you want to control what apps/resources are deployed. |
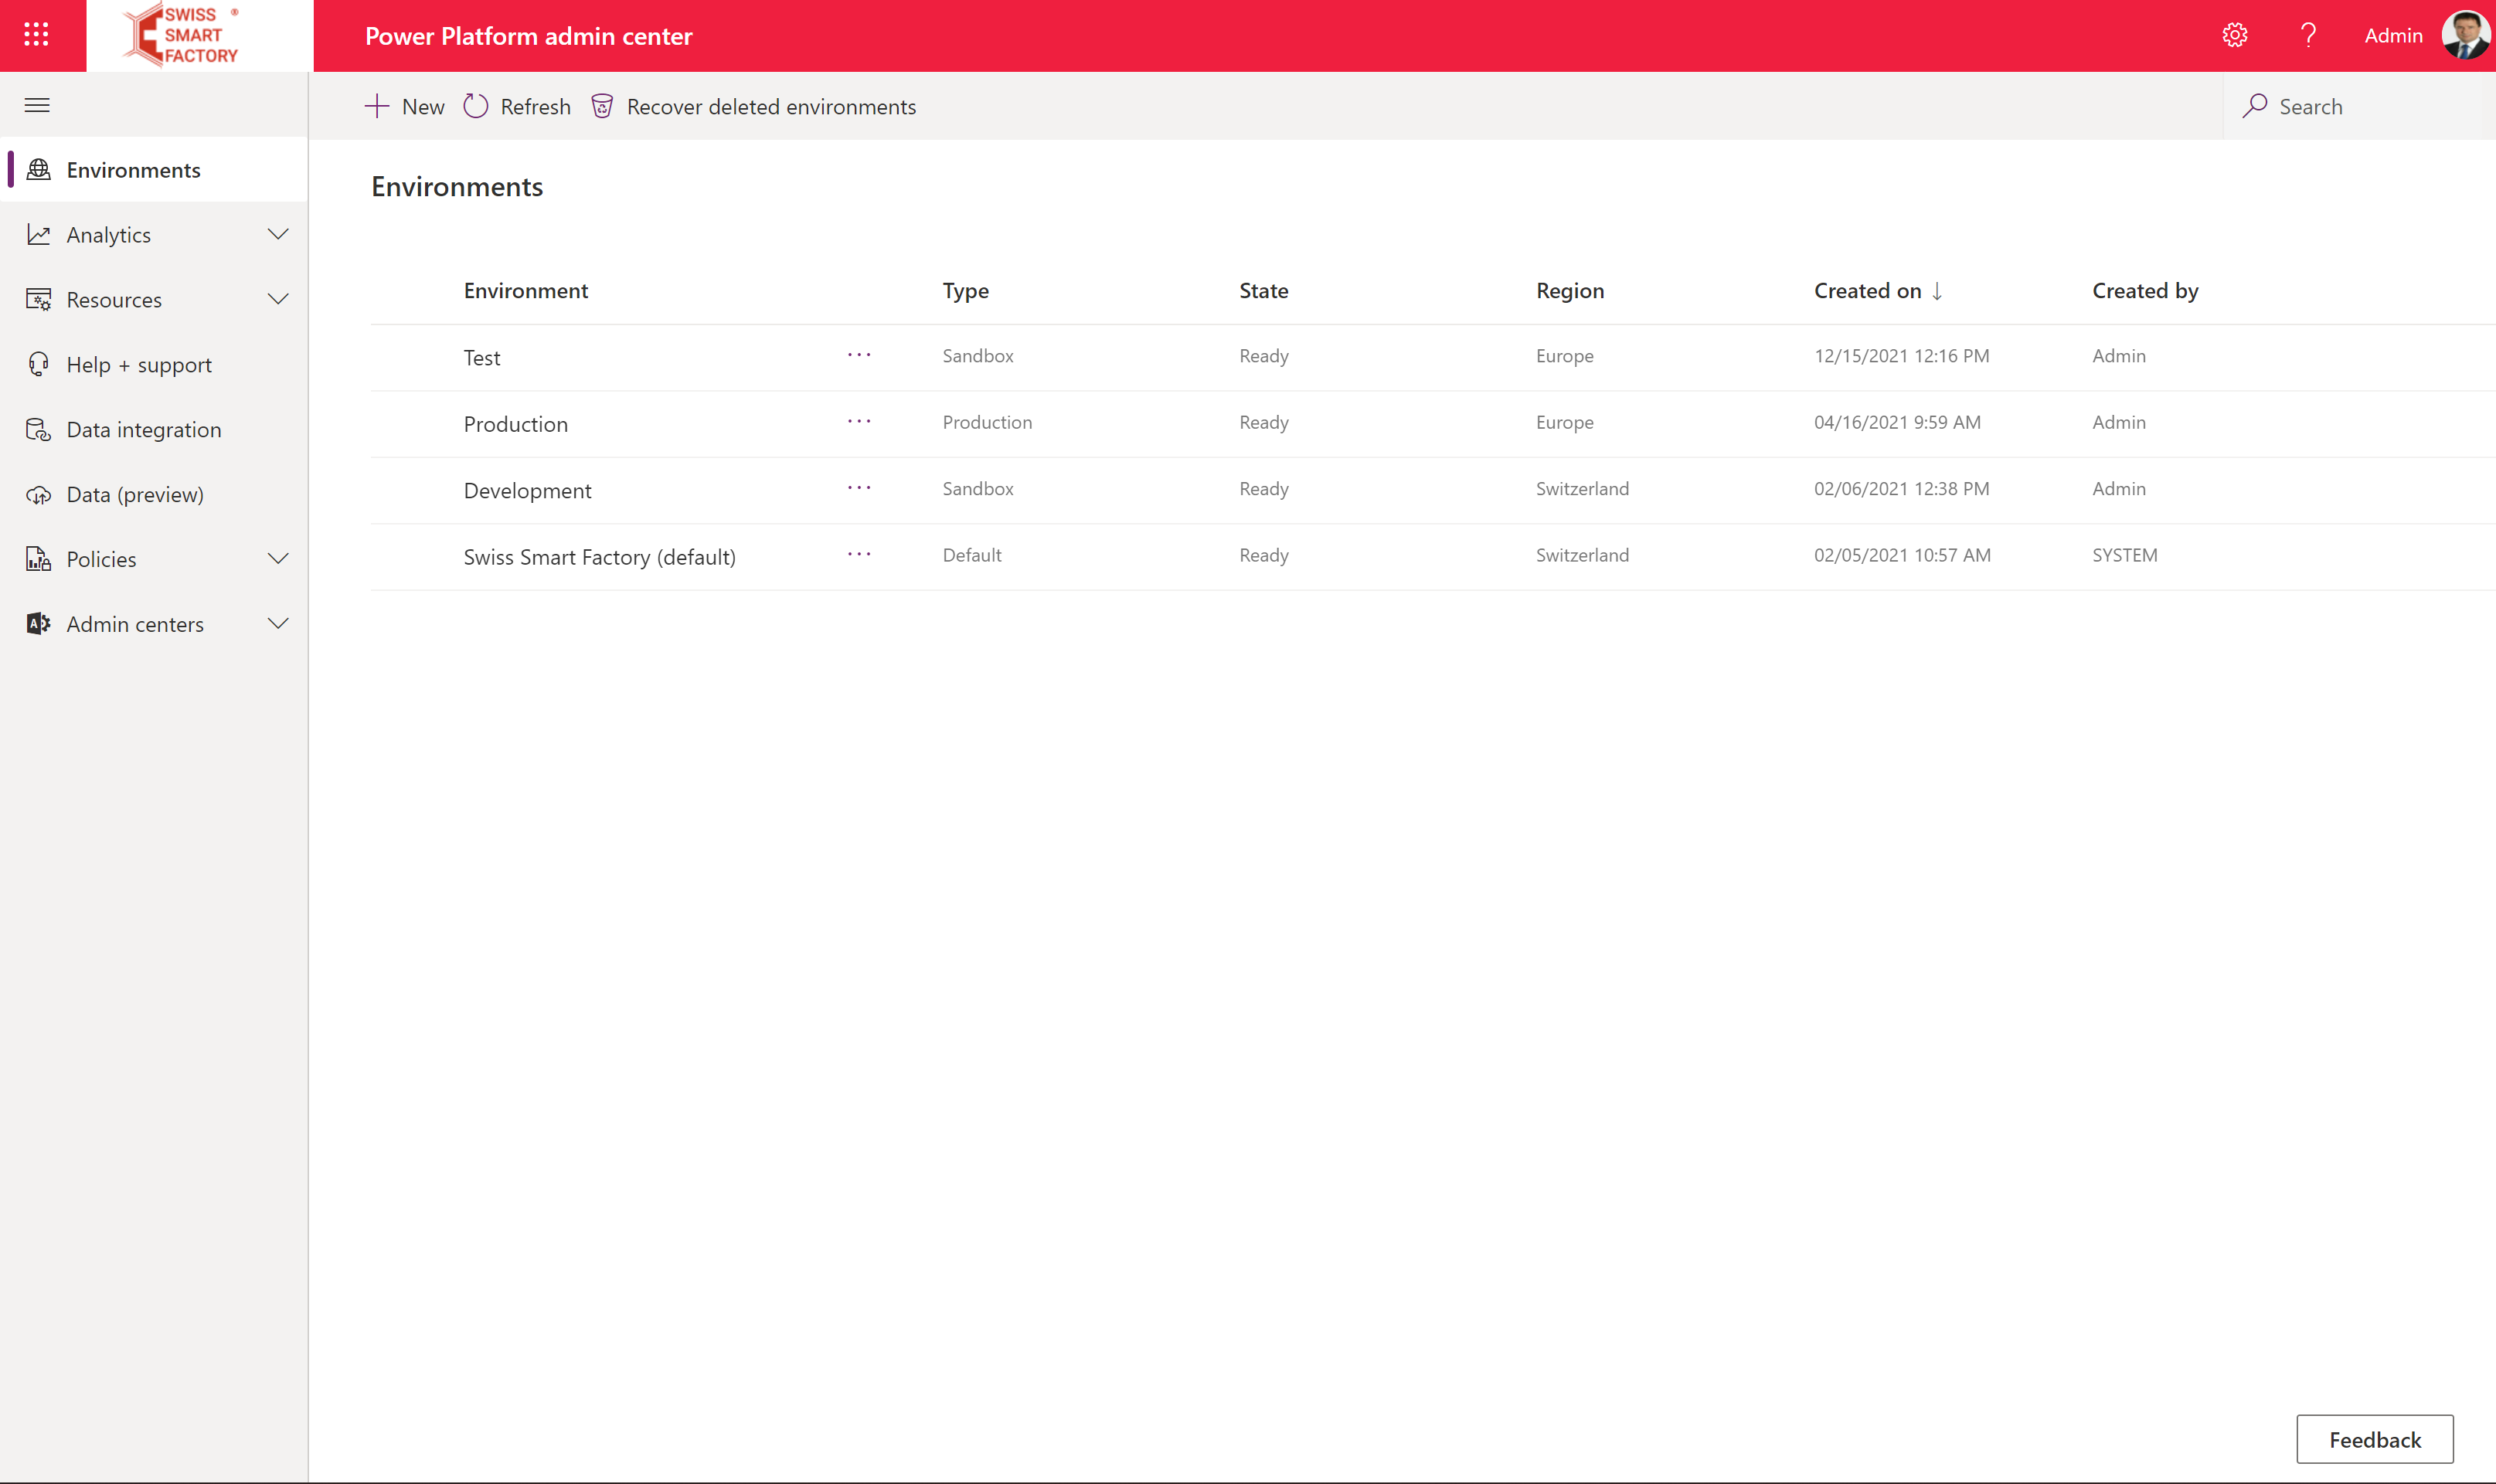
To create these three environments …
- Sign into the Power Platform admin center with credentials that provide access to a tenant with a minimum 3-GB available capacity (required to create the three environments).
- Select Environments in the navigation area.
- Select + New to create your first new environment.
- Apply the required environment configuration for the application.
- After the environment is created, check under Resources - Dynamics 365 apps if all solutions are up to date. If not initiate update for each solution who is not up to date.
- Replay Step 3 – 5 for test and production
- Final cross check. Go back to the environment detail screen of each created environment and check under Version the current Database version. Those should be equal for all new created environments.
Step 2 - Create the service principal account and give it rights to the environments created
Many of the actions require you to connect to a Microsoft Dataverse environment. You can add service principal or user credentials as secrets in your GitHub repository and then use them in the workflow. In our case we are using service principal to establish a connection to the related Microsoft Dataverse environment.
- You will need to create an application registration within Azure Active Directory.
- Display name: GitHubActions
- Supported account types: My organization only
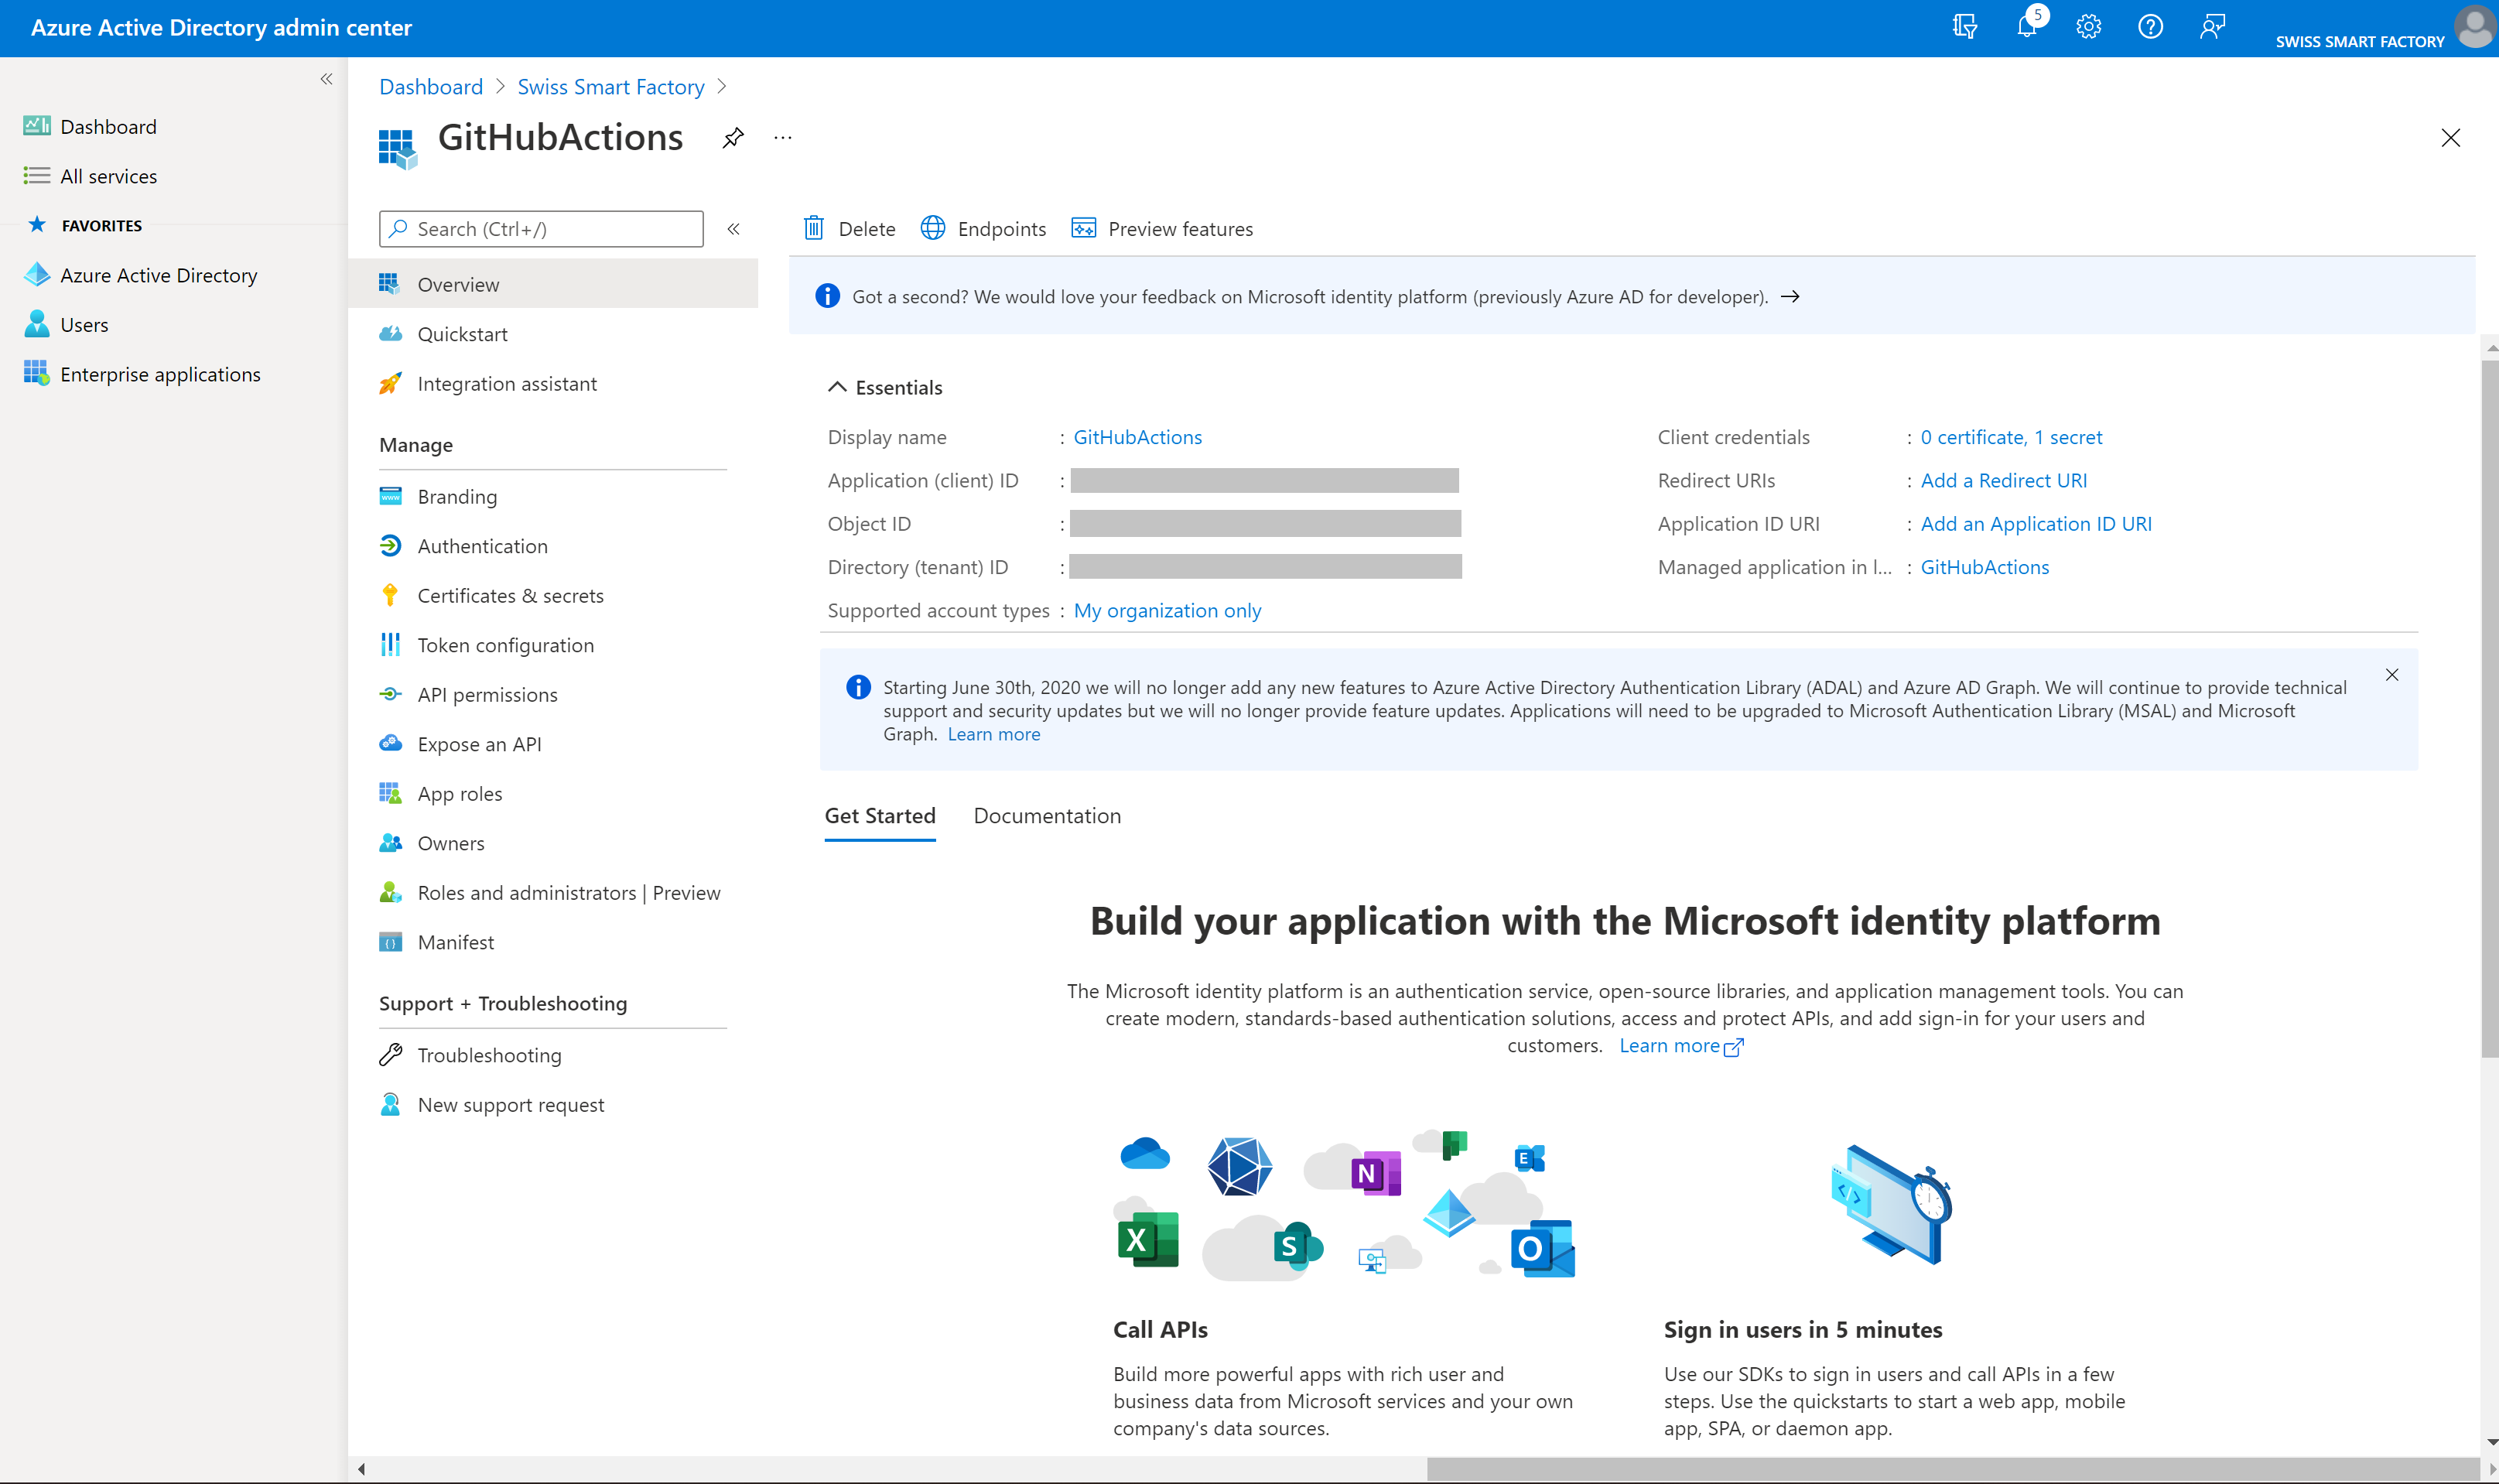
- Upon creation of the application registration, please note and save the Directory (tenant) ID and the of the application.
- On the navigation panel of the Overview page, select API permissions.
- Choose + Add a permission Application (client) ID, and in the Microsoft APIs tab, Choose Dynamics CRM.
- In the Request API permissions form, select Delegated permissions, check user_impersonation, and then choose Add permissions.
- From the Request API permissions form, choose PowerApps Runtime Service, select Delegated permissions, check user_impersonation, and then choose Add permissions.
- From the Request API permissions form, choose APIs my organization uses, search for "PowerApps-Advisor" using the search field, select PowerApps-Advisor in the results list, select Delegated permissions, check Analysis. All rights, and then choose Add permissions.

- Next, proceed to create a client secret, in the navigation panel, select Certificates & secrets.
- Below Client secrets, select + New client secret.
- In the form, enter a description and select Add. Record the secret string, you will not be able view the secret again once you leave the form.

Step 3 - Application user creation
In order for the GitHub workflow to deploy solutions as part of a CI/CD pipeline an "Application user" needs to be given access to the environment. An "Application user" represents an unlicensed user that is authenticated using the application registration completed in the prior steps.
- Navigate to your Dataverse environment (https://[org].crm[region].dynamics.com).
- Navigate to Settings > Security > Users.
- Select the link app users list.
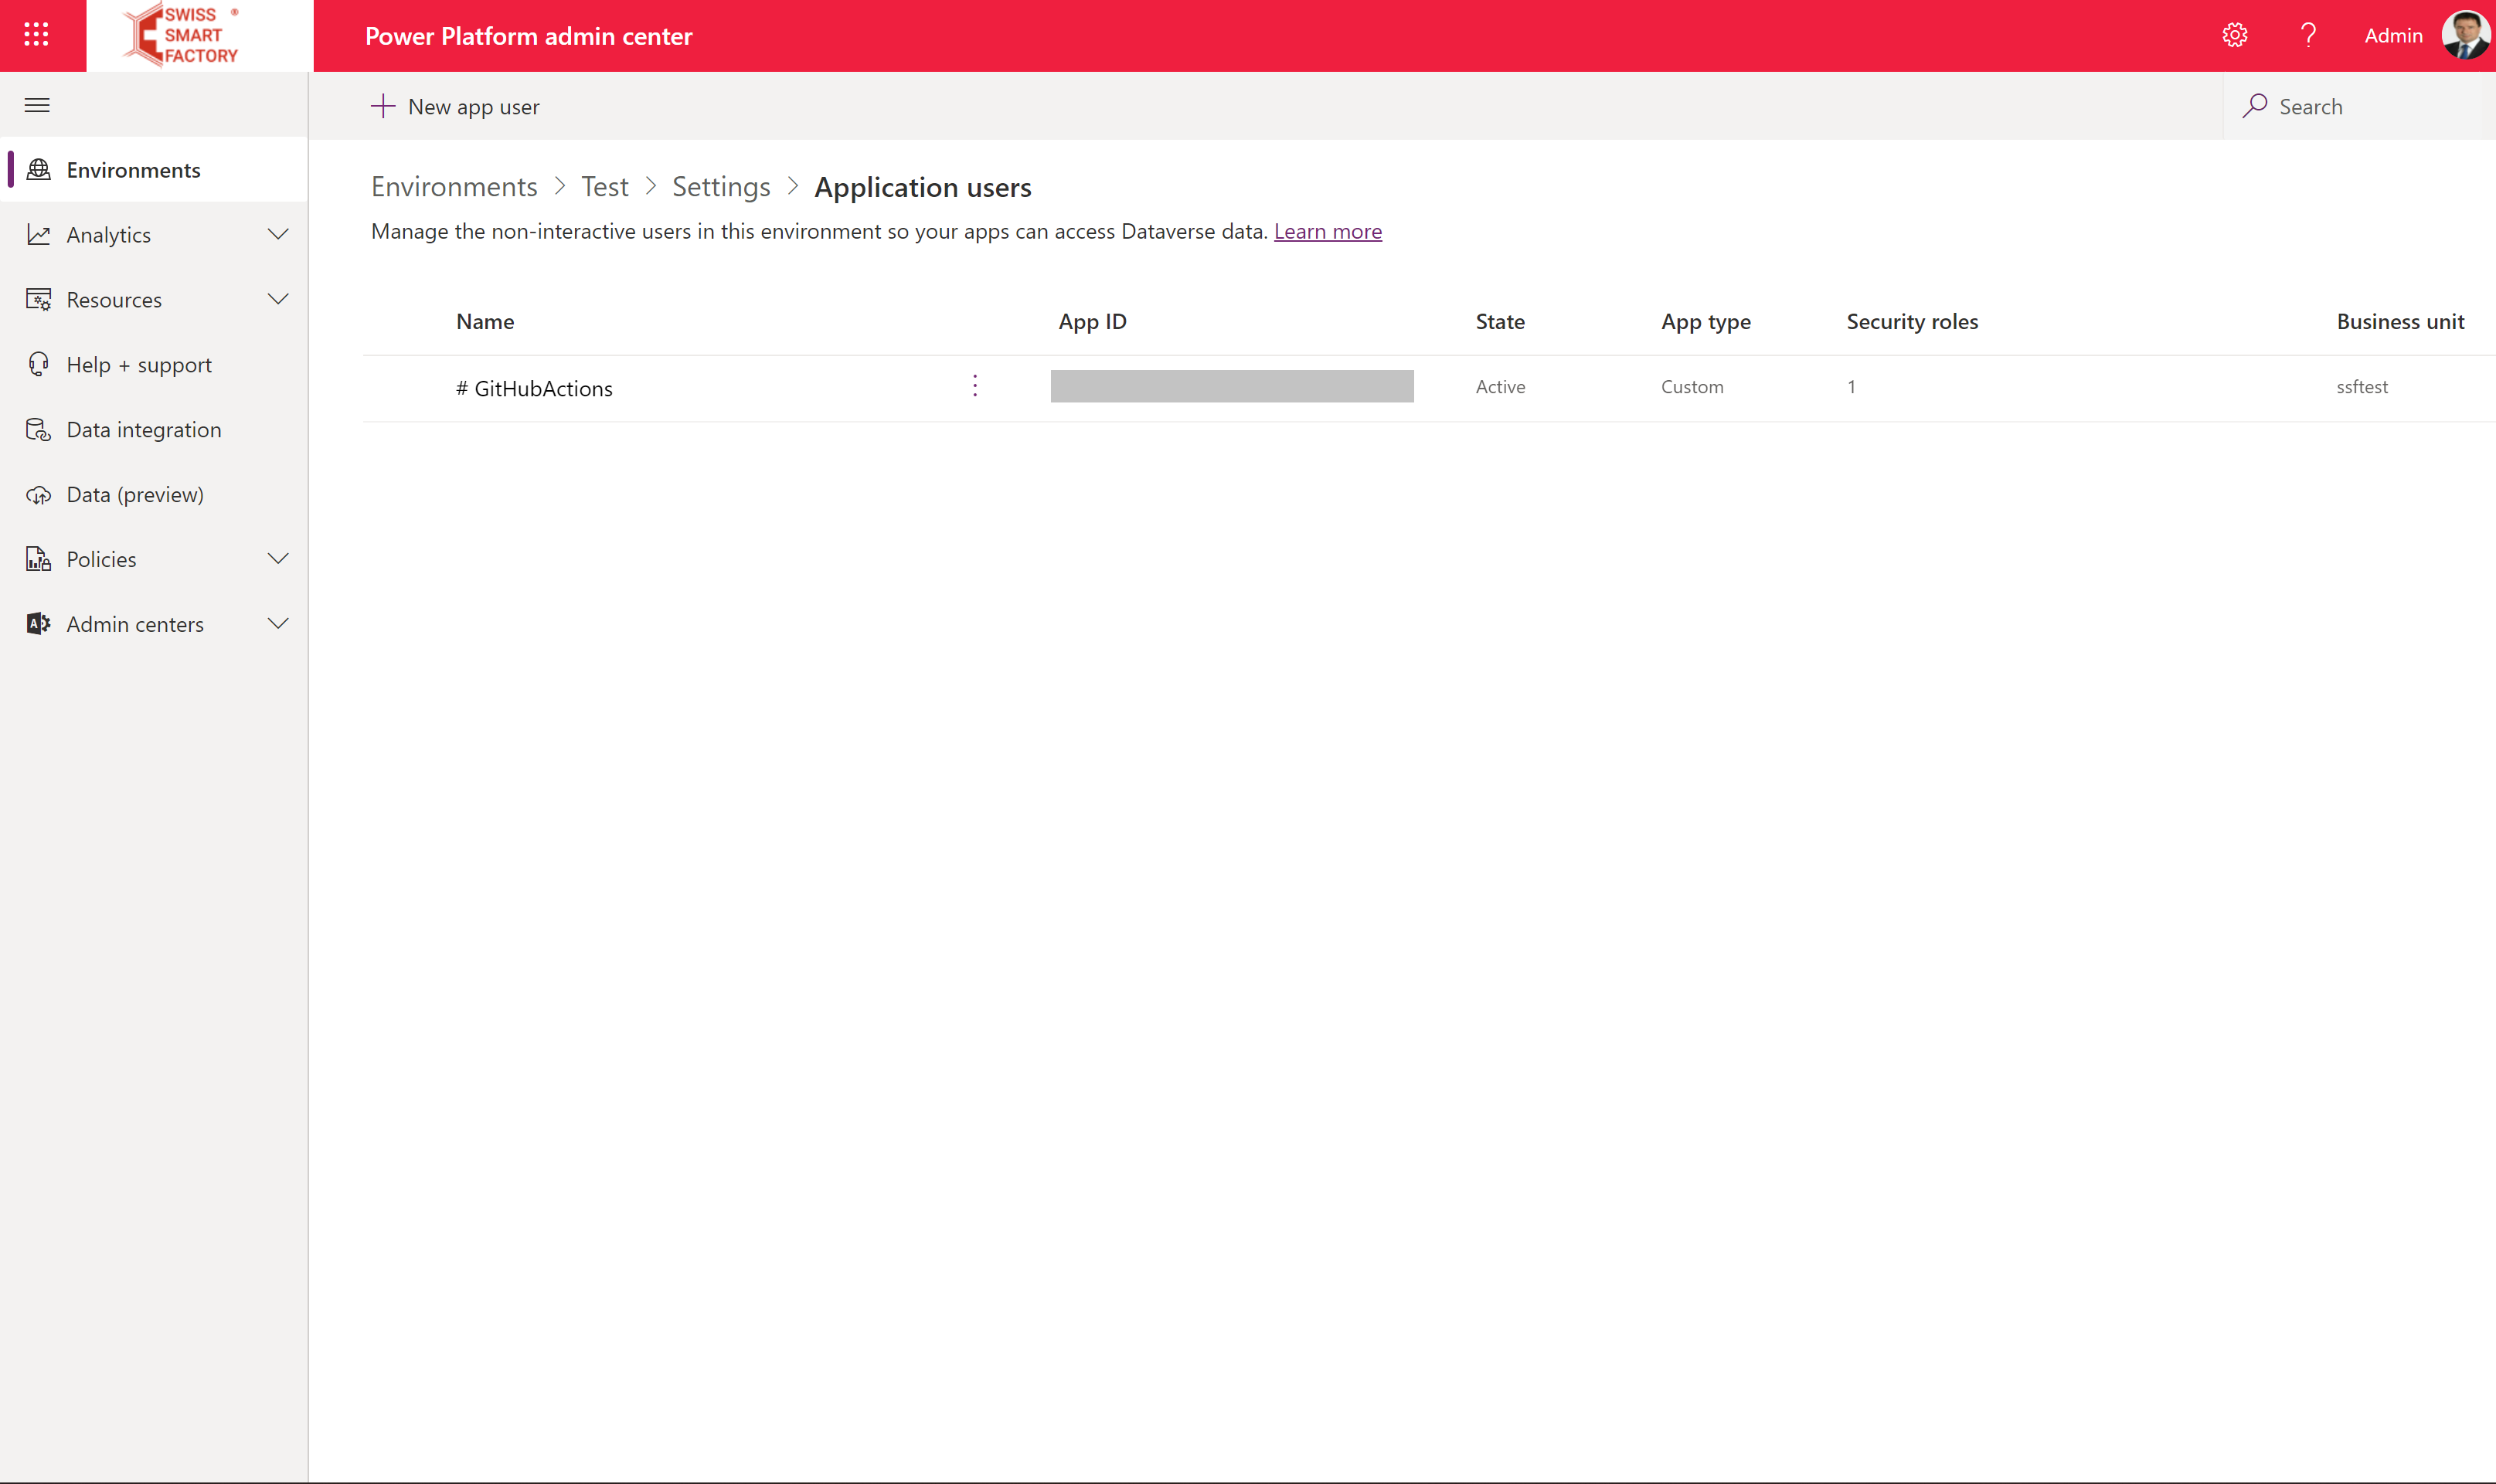
- Application user list
- Select + new app user. A panel will open on the right hand side of the screen.
- Select + Add an app. A list of all the application registrations in your Azure AD tenant is shown. Proceed to select the application name GitHubActions from the list of registered apps.
- Under Business unit, in the drop-down box, select your environment as the business unit.
- Under Security roles, select System administrator, and then select create. This will allow the service principal access to the environment.
- Repeat Step 1 – 8 for test and production
Now that you have created and configured the service principal for all environments and are ready to develop your solution within the development environment. I skip this step as we have our Visitor Management solution and proceed directly to the next step configuring your GitHub Workflows within your GitHub Repository.
Step 4 - Create a new GitHub repository
Create your new repository and name it “Your application name”. Make sure you select Add a README file to initiate the repo and choose Create repository. In our case we created “VisitorManagement” repository.
Create a new secret to be used by GitHub Actions. We need to have the following secrets to be referenced within our GitHub Actions workflows:
- Password, for the username you are using to connect to Microsoft Power Platform
- PowerPlatformSPN, for the Service Principal Authentication
- ClientID, for the Application (client) ID reference
- TentantID, for the Directory (tenant) ID reference
- DevEnvironmentUrl, for the development environment link reference
- BuildEnvironmentUrl, for the build and test environment link reference
- ProdEnvironmentUrl, for the production environment link reference
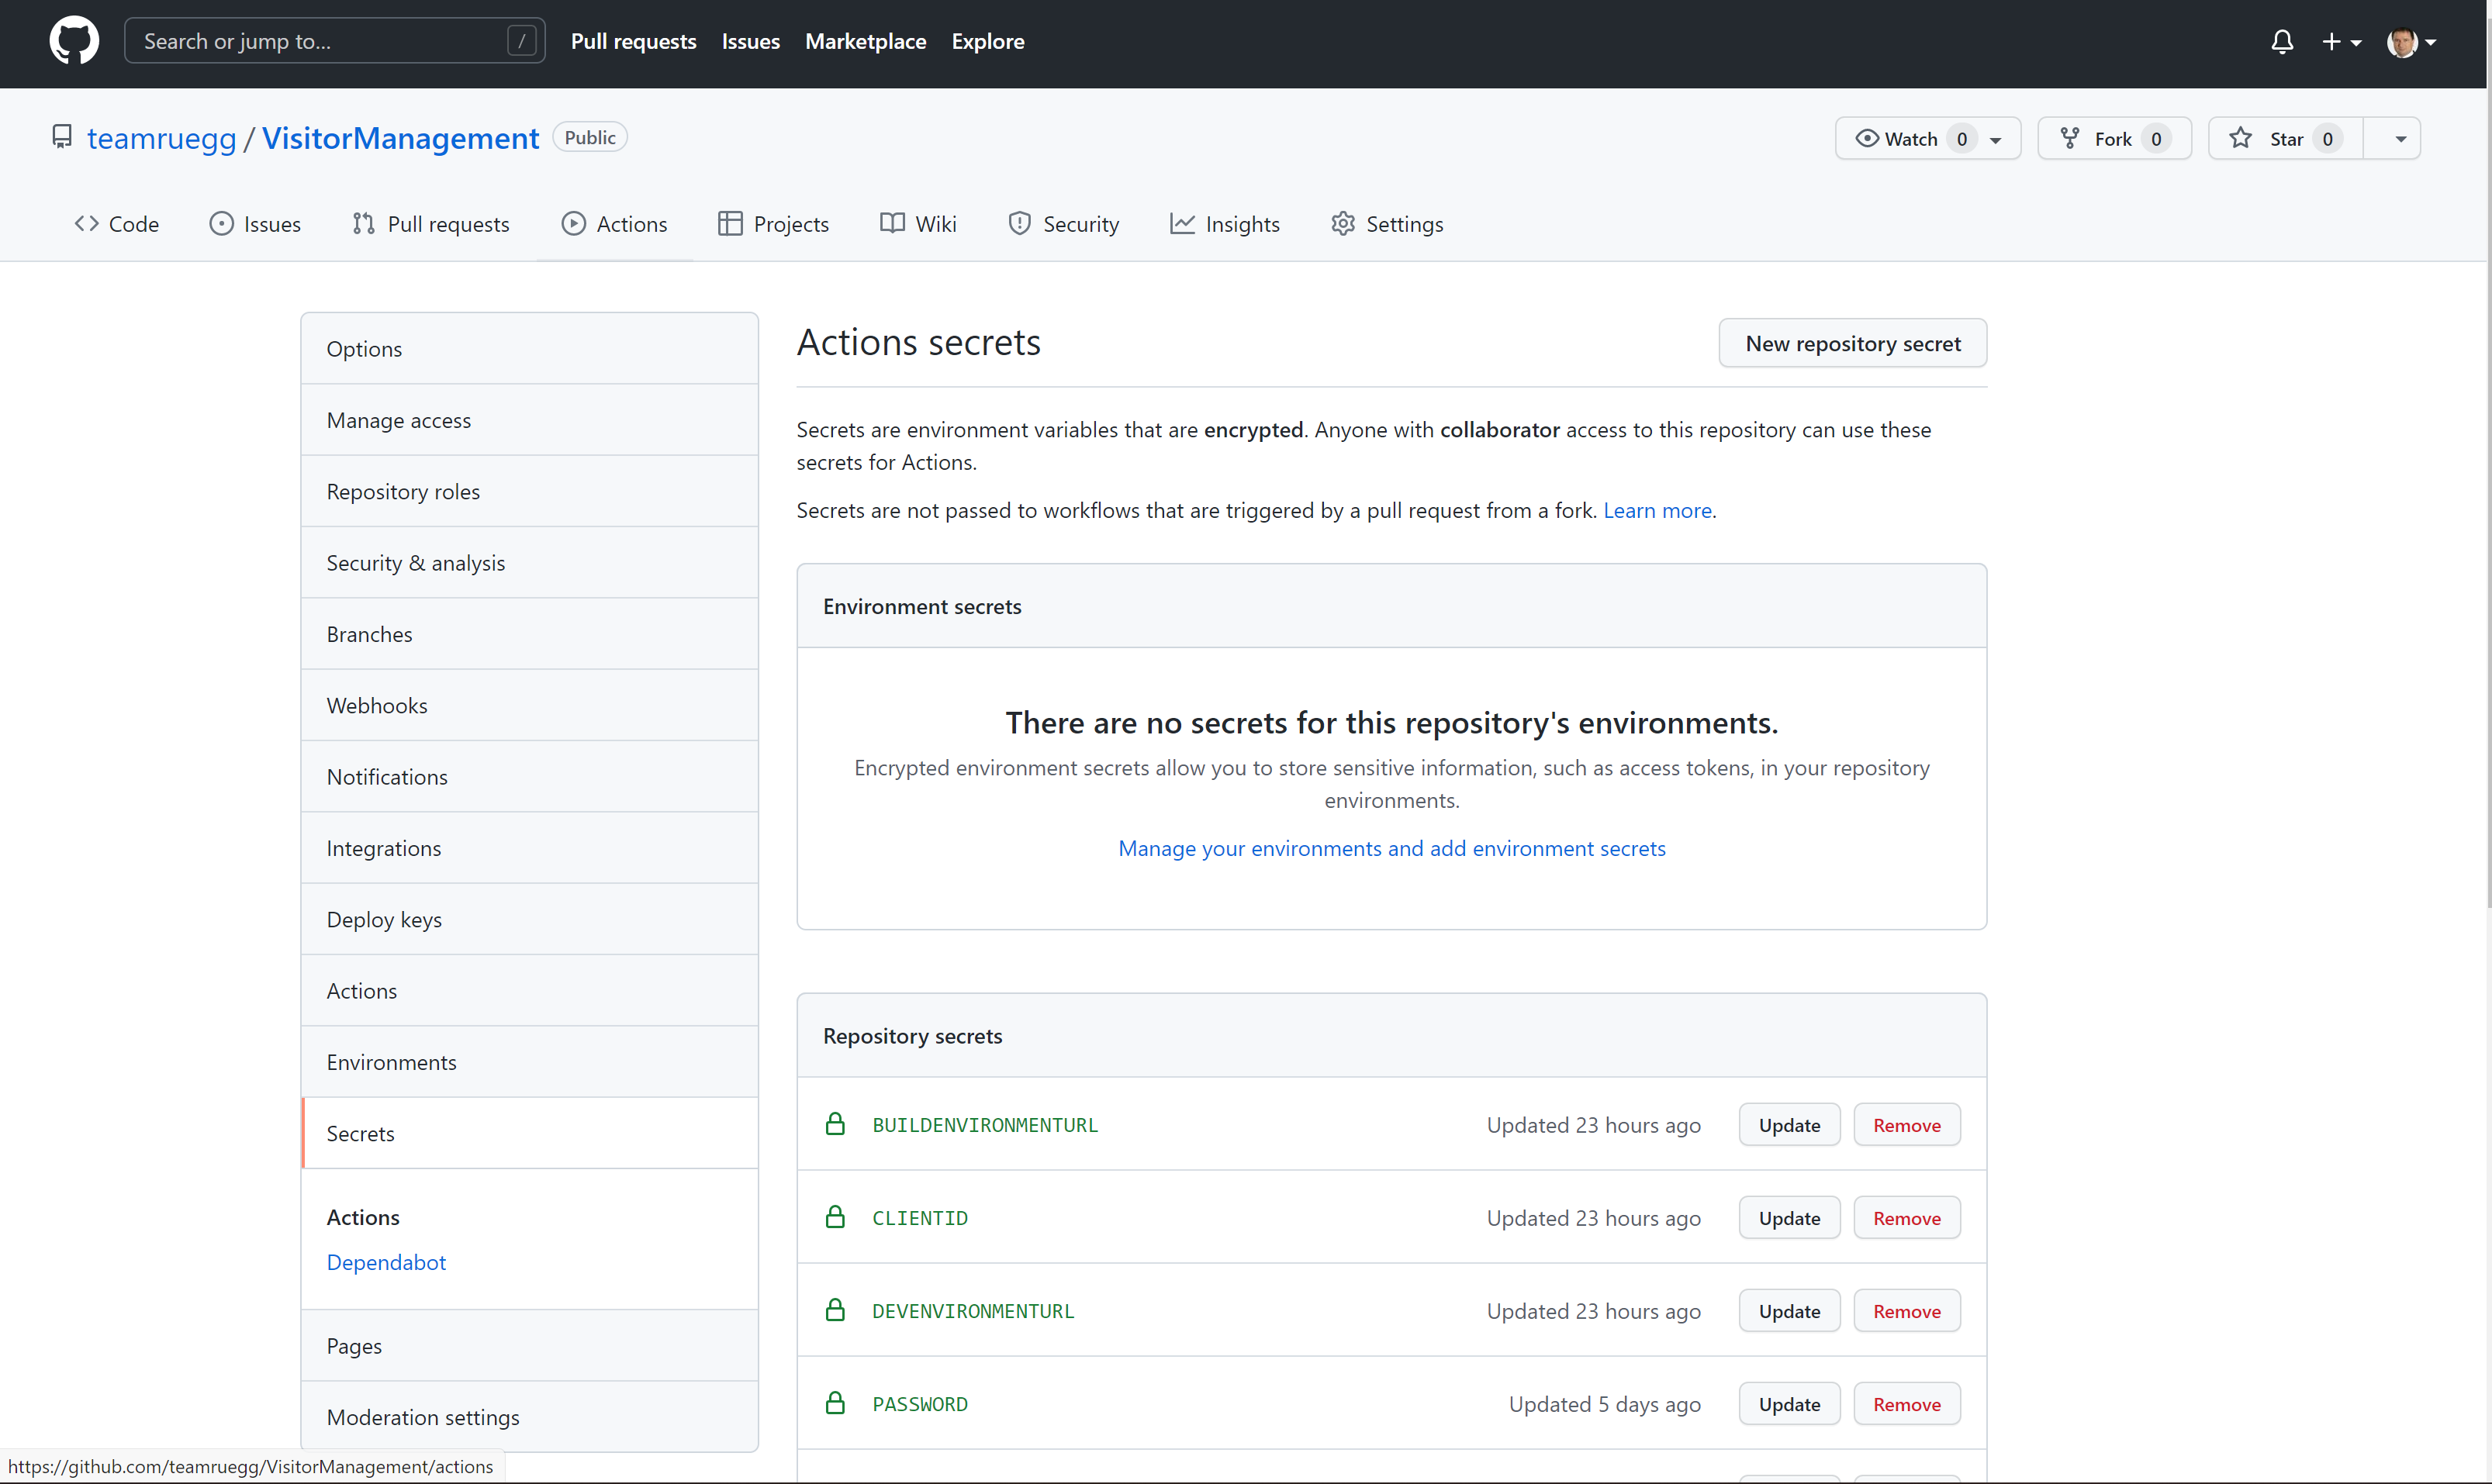
- Navigate to the repo from the link in the import wizard and select Settings, navigate to Secrets, and then click New secret.
- On the secrets page, name the secret ‘password’. Type the password for the username you are using to connect to Microsoft Power Platform into the Value field and select Add secret. The password will be referenced in the YML files used to define the GitHub workflows later.
- Repeat Step 1 – 2 for all other secrets, PowerPlatformSPN, ClientID, TenantID, DevEnvironmentUrl, BuildEnvironmentUrl and ProdEnvironmentUrl.
Step 5 - Create GitHub workflows using GitHub Actions for Microsoft Power Platform
The workflows can automatically export your app (as an unmanaged solution) from a development environment, generate a build artifact (managed solution), and deploy the app into your production environment.
Create a workflow to export and unpack the solution file to a new branch
- Select Actions and then set up a workflow yourself. This will start a new YML file with a basic workflow to help you get started with GitHub Actions.
- Delete the pre-created content, paste the content from the export-and-branch-solution.yml file, and then rename the file to ‘export-and-branch-solution’.yml.
- Update under solution_name: > default: <SOLUTION> with the Name of your solution.
- You are now ready to commit your changes. Select Start commit, type export-and-branch-solution.yml in the title field, and then add a description (optional). Next, click Commit new file.
- Test the export and unpack workflow. Next, test that the workflow runs. Navigate to Actions, Run workflow, and choose Run workflow. If you have a different solution name than “VisitorManagement” then change the value here but leave the other values as is.
- After 5–10 seconds the workflow will start, and you can select the running workflow to monitor progress.
- After the workflow has completed, validate that a new branch has been created with the solution unpacked to the solutions/VisitorManagement folder. Select Code and then Branches.
- Select the branch that was created by the action.
- Validate that the solutions/ VisitorManagement folder has been created in the new branch and then create a pull request to merge the changes into the main branch. Click Pull request.
- In the Open a pull request form, add a title and description (optional), and then choose Create pull request.
- You are then presented with the pull request summary. Confirm that the branch has no conflicts with the main branch and that the changes can be merged into the main branch automatically. Select Squash and merge and then Confirm squash and merge.
- Navigate back to the main branch and validate the solution is now available there as well.
Create a workflow to generate a build artifact and import to production. Now we will create an additional workflow that:
- Creates a managed solution and publishes it as a GitHub artifact
- Imports the build artifact into the production environment
- Navigate to Actions and select New workflow.
- Chose setup a workflow yourself.
- Rename the title of the workflow to ‘release-solution-to-prod’ and copy the content from the release-solution-to-prod.yml file and paste it into the Edit new file
- Update under solution_name: > default: <SOLUTION> with the Name of your solution.
- Commit the changes. Choose Start commit and then add a title and description (optional). Next, select Commit new file.
- Test the release to production workflow. You are now ready to test the last workflow. This workflow is triggered when a new release is deployed to production.
- Navigate to Releases.
- Select Draft a new release.
- Add a release tag, a title, and choose Publish release.
- Select Actions to view the running workflow.
- Choose the running workflow to view the actions as they run.
- Wait for each action to complete.
- After the workflow has completed, log into your production environment and validate that the solution has been deployed as a managed solution.

Über den Autor
Urs Rüegg
Urs Passion ist es komplexe und multinationale Projekte zu liefern. Seit 2000 wurden über 25 CRM-, 12 Entwicklungs- und 8 Infrastruktur-Projekte geliefert.
In der Freizeit liebt Urs die Gaumenfreuden aus aller Herren Ländern zu entdecken und frei nach Aristoteles und Plutarch zu geniessen.